
A comprehensive review of the new Donic Blue Contact Glue, a glue specifically designed for popular ‘large pore’ rubbers, which can be hard to glue down. This review covers the ease of use, things to watch out for, and some tips.
Large Pore Sponges
I glue a lot of bats regularly, and since I happened to (temporarily) ran out of my favourite glue, the Donic Vario Clean, I thought I’d use this opportunity to test and review the Blue Contact Glue, which does seem to be popular among some, although it’s a little more expensive than the Vario.
Butterfly started the trend with ‘large pore’ sponges , followed closely by other major manufacturers, a closeup of an example (Bluefire M1) shows right.
Although these large pores appear to give the rubbers their unique performance, they tend to be harder to glue down because;
- As you spread glue it seeps into the pores, so less glue resides on the surface, and
- Less surface area actually makes contact with the blade, making the bond weaker.
The Blue Contact glue attempts to address this issue by making the glue thicker without it getting lumpy.
 The Bottle
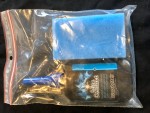
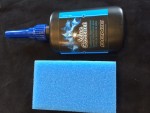
The glue comes in a 90ml bottle and includes a bunch of sponges used for spreading out the glue, all in a generic plastic zip-lock bag.
The sponges are pre-cut so that you can simply pull off a single piece for a glue job. To save on sponges, it’s wise to only use one side of the sponge at the time, so that you can use the other side for the next glue job.
When I removed the cap of the bottle, I was please to see that the nozzle was completely sealed, so that there is no chance of the glue drying up due to air leaking in.
 To start using the glue, simply cut off the tip with some scissors, and you’re ready to go. The cap does feel like it seals the bottle very well, so I would not expect too many problems with the glue drying up after usage, unless you don’t use it for a long time.
 Spreading the glue
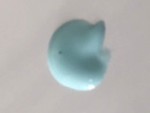
The texture of the glue is thick and creamy, of similar thickness as most sun-screen creams from bottles or tubes. Spreading the glue was very easy, and not too much seamed to soak into the applicator sponge, especially after the first application.
Because the glue is thicker, you do need to take more care to get a nice and flat finish, because it does not flatten out as easily and thinner glues do.
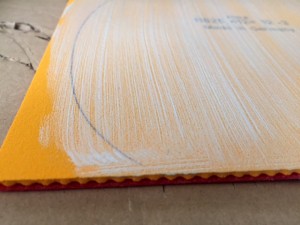 One thing I really like about this glue is that you get plenty of time to spread out the glue, and you don’t need to rush to finish the job before it start drying, because as soon as a glue starts drying it ‘balls up’, and you get lots of little particles spread everywhere.
The downside of this is that it takes a little longer to dry, but that’s nothing that a fan or some waving of the bat can’t fix.
As you can see pictured (right), this jobs needs a little more spreading to get a smooth finish.
 The thicker texture makes it susceptible to getting blobs of glue on the edges or handle piece of the blade, so you need to wipe those off before it dries.
I had a few bats to glue, and the one on the right shows how easy it is to get glue on the edge on handle, but it’s easily wiped off.
After the glue is spread, it leaves a creamish colour with a blue tint, which slowly dried, leave a bit of a dirty blue tint when it’s dry.
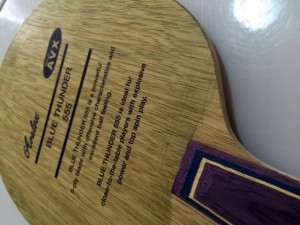 Once both the rubber and blade are dry, they both have a slightly sticky feel (you can touch lightly with your fingers to feel), and unlike some other glues, no further layers are required.
The rubber and blade are put together just as normal, and once the rubber is pushed down, it sticks immediate with a good bond.
I normally cut with a sharp knife onto a sheet of carton from old boxes, and press the bat down onto the carton while cutting, to ensure there is no pulling on the rubber that might affect the glue bond.
 You’ll find that there’s always a little glue on edges, which tend to ‘ball up’ as shown. This is not a big deal, and can simply be pulled off while pressing the rubber and blade together at the point where the glue is.
The blue residue on the edge can simply be rubbed off with your fingers, or be covered by edge tape, so that’s not a big deal.
I do like to put the bat into a press just for a few minutes, to ensure good contact is made over the whole surface of the rubber.
Removal
Thicker glues tend to be easier to remove, and this is what I found with the Blue Contact as well. It rubbed off easily just with my fingers. I have not yet used the glue for a long time to see what the long term effect is, but all glues become harder to remove over time, and often the rubber is thrown away after a long time anyway, so removal of the glue from the rubber (which is always harder) may not even be required.
Conclusion
So would I recommend this glue? Well I think that the Vario glue is easier to spread evenly, and since this dries clear, it leaves less mess to clean up. However for large pore rubbers, sometimes a second coat is required with the Vario glue, whereas the Blue Contact forms a really good bond with a single layer. The Blue Contact also gives you considerable more time to spread the glue, which may be particularly important if you’re not very experienced and need more time. Any mess you do make is very easy to remove as it simply rubs off with your finger.
I think Blue Contact a very good quality glue, and although it’s a little more expensive (compared to Donic Vario but it’s cheaper than many other Euro/Japanese brands), it can certainly be justified for some people.
Happy to answer any further questions, just post them below.


Is there a video or pics on how hard it is to remove the glue from the sponge of the rubber?