
This article described a new and easier way to glue long pimple table tennis rubbers without sponge (OX) onto you blade, producing a really neat finish!
Unless a rubber comes with a glue sheet already attached, gluing a long pimple without sponge can be very tricky, especially when it’s very flimsy and wrinkly out of the packet! Being a long pimple player myself, as well as having to glue rubbers for the OOAK Shop, I’ve tried many methods over the years, but this method has proven to be by far the easiest, and seems to provide a near perfect finish every time, so I thought I should share it!
What you need
Well you need table tennis glue… and I would recommend a thin one that spreads very smoothly, because with an OX rubber you’ve going to see any type of bumps very easily. My preference is for the glues like Donic Formula First, which comes in a small 25g bottle with a sponge attached to the lid. Almost every major brand has one of these, and they’re all basically all the same. I like them because the glue is very thin, quite strong and spreads very smoothly.
NOTE: Some of these glues are really strong, and I’d advise sealing the blade before you use them, or you’ll run the risk of pulling off fibers from the wood when you remove it from the blade.
The other thing you need is a glue sheet…. no NOT to glue the rubber to the bat. but for different purpose altogether, where you can keep re-using to glue the rubber just with normal glue! The glue sheet should be strong (most are), and if it has 2 different strength on either side, use the stronger side for this procedure. For this procedure I used a Giant Dragon glue sheet.
The main idea of the glue sheet is to attach it to the pimple side of the rubber to make the assemble more rigid, making it much easier to handle and making gluing almost as easy as an inverted sheet.
Gluing the rubber to the blade – step by step
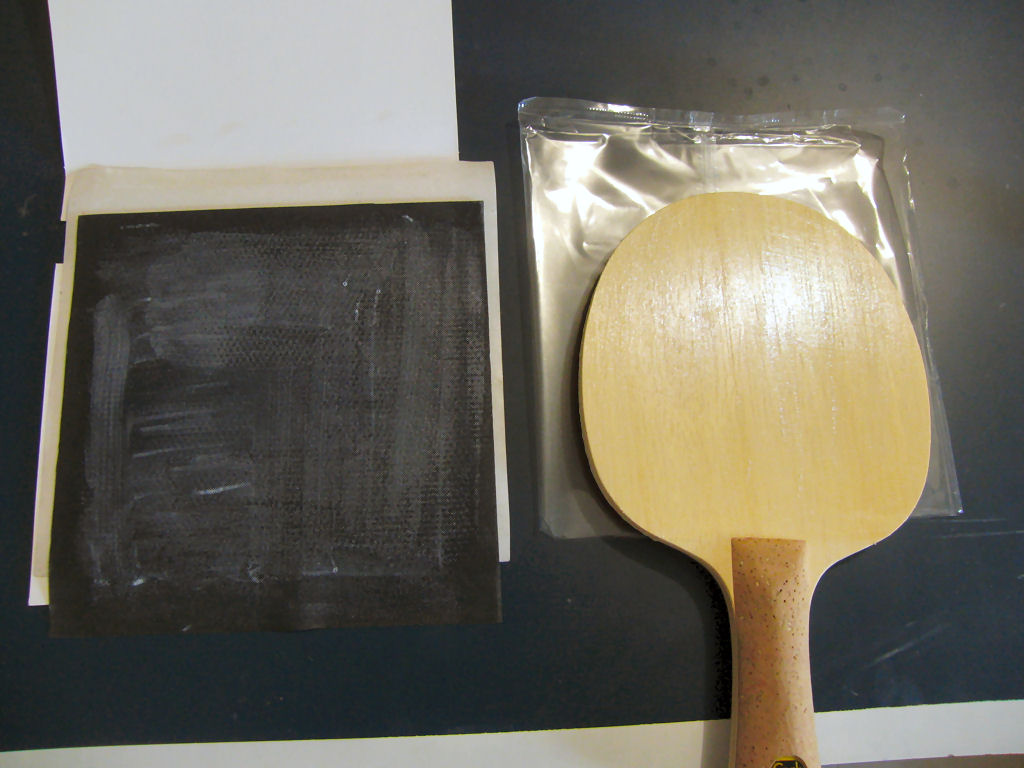
Ok, you’ve got you blade, rubber, glue sheet and glue ready.

Start by putting the OX rubber on a flat and smooth surface like a table, with the pimple pointing up. Make sure the sheet is completely smooth, and push out any bumps if necessary.
Note: Some sheets are very flimsy and badly wrinkled, and if this is the case use some masking tape to stretch it flat onto the table. Only stretch enough to flatten out the bumps, because if you stretch too much, it may produce an skewed sheet onto the blade.
Next pull off the one side of the glue sheet, exposing the adhesive side. Put this sheet flat onto onto the tips of the pimples, lining it up where the pimples start at the bottom (do not include the flat label section), or it can get hard lining it up with the blade later.

Since the pimple sheet is flat on the surface, and the glue sheet is rigid enough to hold it flat, it should be quite easy to put them together.
Get you roller, or whatever you normally use to roll after attached a rubber, and roll it over the glue sheet, to ensure that the pimple tips are firmly attached to the glue sheet.
 The glue sheet and the rubber sheet should now be a fairly rigid assembly, making it much easier to line up to the blade and put together.
Next glue both the blade and the back of the rubber sheet, and leave to dry. Since OX sheets tend to be harder to stick to wood, make sure you use a little more glue than you’d normally use for attaching sponged rubbers.
Wait for both surfaces to dry, and then you’re ready to put them together. I usually pick up the rubber sheet with both hands so that I hold the bottom bit of the rubber (label section) with my pinky & palm, and the rest with by thumbs & palm.
Line up the bottom bit of the rubber with the handle and place the sheet on top of the blade. Since the rubber and glue sheet assembly is quite rigid, it should be quite easy to do.

Next press down the sheet as you would with an inverted rubber, and roll over it with the roller to ensure it’s flat with no bubbles underneath. it should now be perfectly flat and well attached to the blade.

Now it’s time to remove the glue sheet. Since the tips of the pimple are quite skinny, the bond between the glue-sheet and pimple is not very strong, so you should be able to pull off the glue sheet fairly easily without pulling the rubber off the blade.
Put the glue sheet back onto the backing that it came from, because you can re-use it many times!
Tip: Remove the glue sheet by pulling across the sheet, not pulling upwards which puts less stress on the blade to rubber bond.

After you’ve pulled off the glue sheet, run the roller over it again to ensure every bit of the rubber is still well attached. You’ll need to press the label bit down with your fingers, as the roller can’t reach this, but this is fairly easy too.
Now it’s a simple matter of cutting the rubber sheet along the edge of the blade, which is usually done best with some small scissors.

After this it’s basically finished, although I always like to put it in the press for a while (books would do fine too), to give it that little extra pressure.

The finished table tennis bat should look good, with the pimples well lined up.
Why not use the glue sheet to attach to the blade?
A good questions, and there are 3 reasons I much prefer to use my method;
1. Glue sheets tend to form a very strong bond to the blade, making it very hard to remove, risking damage to the blade (if you can even remove it) and almost certainly destroying the glue sheet.
2. Although a glue sheet is very thin, it does affect the feel of the bat (which is much more significant when using an OX rubber), and tend to soften the feel causing somewhat less spin reversal. Yes it’s only minor, but it does make a difference.
3. Using this method you can re-use the glue sheet many times!
Final words
Pretty neat, isn’t it? Try it and let me know if it works for you, or if you’ve got an even better way!
PS I should mention that I didn’t think of this idea myself, but got the idea from someone on OOAK Forum during a discussion. If I could remember who it was, i would gladly give him credit!
Please like this on Facebook and you find it handy.
By: haggisv

Realy good instructions. Thank you so much. I had a disaster with these non sponge rubbers due to inexperience.
I can’t wait to try this on my next LP setup.
I went to yes paste because of the nightmare of gluing ox LP
Over the years I have tried wax paper,weights on all 4 corners ect.
Now I need to find the perfect LP/SP blade.
After years of trying different blades. I have found the lightest blade
works best for me. I am using hunter flame blade SH now 70g. winning np 8
388 d . I can play either bh fh with either rubber. I don’t chop much.Play on the T. I am a hitter.
Any thoughts about light offensive blades?
Sorry to ramble on.
THANKYOU!
I bever use gluesheet , i just glue the rubber to the bat like a normal rubber, i dont have problems with that.
I don’t think you understood the article, perhaps it does not translate well. This method does NOT use a glue sheet to attach the rubber to the blade, it only uses the glue sheet to keep the OX rubber flat and rigid, and then uses normal glue to attach to the blade. This way you can use the glue sheet MANY times, and you don’t have the trouble of having to remove it!
[…] trave na drvo je korištenjem samoljepljive folije. Prvo se skine papir sa jedne strane folije. Na OOAK forumu preporučeno je da se folija nalijepi na drvo korištenjem stolnoteniskog ljepila, a ne direktno. […]
[…] not glued an OX rubber before at all, I’d advise you to read my other article, titled Gluing a long pimple rubber without sponge – a novel new way! I still use this method for all the bats I glue for the shop, and it works […]